Most budget vape problems come down to one culprit: a dead or poorly connected battery. Before you assume your device is broken, check that it’s actually charged and that the charging cable is making solid contact. Many Canadian vapers discover their “faulty” device just needed 20 minutes on the charger.
If charging doesn’t solve it, the next likely issues are a clogged airflow, burnt coil, or dirty connection points where the tank meets the battery. Budget devices lack the quality control and durability of premium models, which means small problems turn into total failures faster. A bit of e-liquid in the wrong place or a connection that’s slightly off can stop the whole device from firing.
This guide walks through the most common budget vape malfunctions, shows you exactly how to diagnose what’s wrong with your device, and gives you step-by-step fixes that work. You’ll learn when a quick cleaning will get you back to vaping, when you need a replacement part, and when it’s time to retire the device entirely. We’ll also cover how to spot the warning signs of a genuine safety issue, because knowing when to stop troubleshooting and dispose of a device properly matters as much as knowing how to fix it.
Identifying What’s Wrong: Common Symptoms
Before you can fix your budget vape, you need to pinpoint exactly what’s wrong. Most malfunctions fall into a few recognizable patterns, and identifying your specific symptom is the first step toward getting your device working again.
Here are the most common signs that something’s gone wrong with your vaporizer:
- No power response when you press the fire button or attempt to turn the device on
- Device won’t charge or shows no indication of charging when plugged in
- Weak vapor production that’s noticeably thinner than usual, or no vapor at all
- Burnt, harsh, or unpleasant taste with every draw
- E-liquid leaking from the tank, mouthpiece, or airflow vents
- Blinking lights in patterns you haven’t seen before, or error indicators on the screen
- Gurgling sounds or liquid in your mouth when you inhale
- Inconsistent performance where the device works intermittently
Take a moment to identify which symptom matches your situation. You might be dealing with more than one issue, which is common when a device has been neglected or has reached the end of its useful life. Write down what you’re experiencing so you can reference it as you work through potential solutions.
The good news is that each of these symptoms points to specific causes, and many have straightforward fixes you can try at home. Even if you’re new to vaping, the troubleshooting steps ahead will walk you through methodical checks that address the most likely culprits. Start by being honest about what you’re observing, because accurate diagnosis makes all the difference between a quick fix and wasted effort.
Why Budget Vapes Stop Working: The Main Culprits
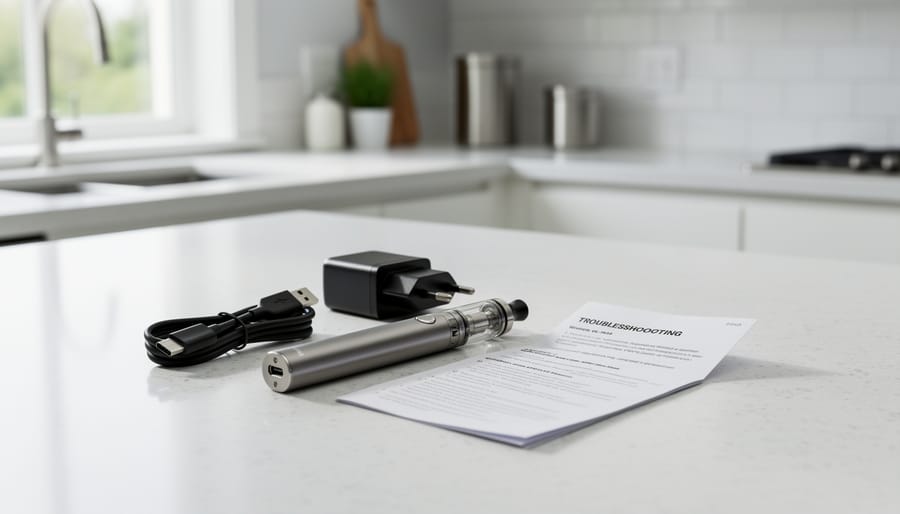
Budget vapes fail for reasons that usually trace back to a few key weak points in their design and materials. Understanding what’s actually breaking helps you fix the problem faster and decide whether a repair is worth the effort.
Battery issues top the list. When you first charge a new device, the battery holds its full capacity, but that capacity shrinks with repeated charging cycles. Different vape battery types degrade at different rates, and budget models often use lower-grade cells that lose charge-holding ability more quickly. You’ll notice this as shorter sessions between charges, then eventually the battery won’t power the device at all. Beyond gradual wear, batteries also fail if you drain them completely too often or expose them to extreme temperatures.
Coil burnout ranks as the second major culprit. The coil, a small heating element wrapped in wicking material, takes the most abuse in your vape. It gets hot hundreds of times per day, and that constant heating breaks down both the metal wire and the cotton or silica wick. Once the wick material chars or the wire develops hotspots, you get burnt hits and reduced vapor. Budget coils typically use thinner wire and less durable wicking, so they burn out faster than premium alternatives.
Connection problems between the battery, coil, and tank cause surprisingly common failures. Budget devices often have looser threading, weaker magnets, or spring-loaded pins that wear down. When these connection points get dirty, corroded, or physically damaged, electricity can’t flow properly even if the battery and coil are fine. Sometimes the fix is as simple as cleaning the contacts; other times the threading has stripped and won’t hold components together anymore.
- Coil Resistance
- Measured in ohms, this indicates how much the coil restricts electrical flow and determines how much heat it produces. Lower resistance coils draw more power and wear out faster.
- Battery mAh
- Milliamp-hours measure how much charge a battery stores. Higher mAh means longer use between charges, but capacity drops as the battery ages.
- Connection Pin
- The metal contact point that transfers power from the battery to the coil. It can become dirty, corroded, or stuck, preventing proper electrical connection.
- Airflow
- The path air travels through your device as you inhale. Blockages here reduce vapor production and can cause pressure imbalances that lead to leaking.
- VG/PG Ratio
- The proportion of vegetable glycerin to propylene glycol in e-liquid. High VG liquids are thicker and can clog coils or fail to wick properly in devices designed for thinner juice.
E-liquid compatibility issues create another failure point. If you fill your tank with juice that’s too thick for the coil’s wicking ports, the wick can’t absorb it fast enough. You’ll burn the dry wick instead of vaporizing liquid, ruining the coil in just a few hits. Running the tank completely empty causes the same problem, dry hits that char the wick immediately.
Airflow blockages stop vapor production even when everything else works perfectly. Lint from pockets, condensed e-liquid, or debris can clog the tiny air channels that pull vapor from the coil to your mouth. This creates suction problems and weak vapor output that mimics a dead coil.
Manufacturing variability matters more with budget models. Tighter quality control costs money, so budget manufacturers sometimes ship devices with imperfect seals, misaligned parts, or components that barely meet minimum specs. That doesn’t mean every budget vape is defective, but it does mean you’re more likely to encounter a dud or a device that fails sooner than expected.
Step-by-Step Fixes for Budget Vape Problems
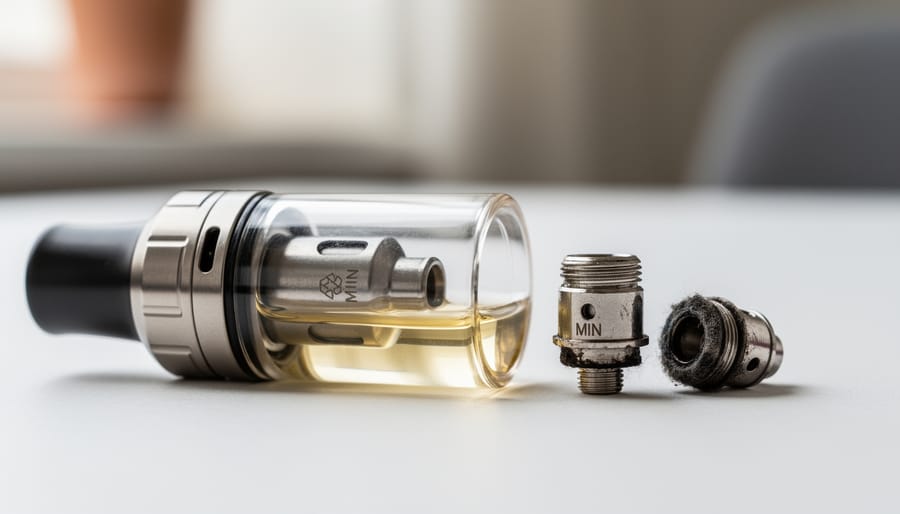
Device Won’t Turn On or Charge
When your budget vape refuses to power on or won’t charge, start with these systematic checks before assuming the device is dead:
- Verify battery depletion: If your device has been sitting unused or you’ve been vaping heavily, the battery may simply be drained. Connect it to a charger and wait at least 10-15 minutes before testing again, as deeply discharged batteries sometimes need time to respond.
- Try different charging equipment: Faulty cables and adapters are common culprits. Test with a different USB cable and wall adapter if available. Many charging issues stem from worn cables rather than the device itself, particularly if you’ve been bending the cable at sharp angles near the connector.
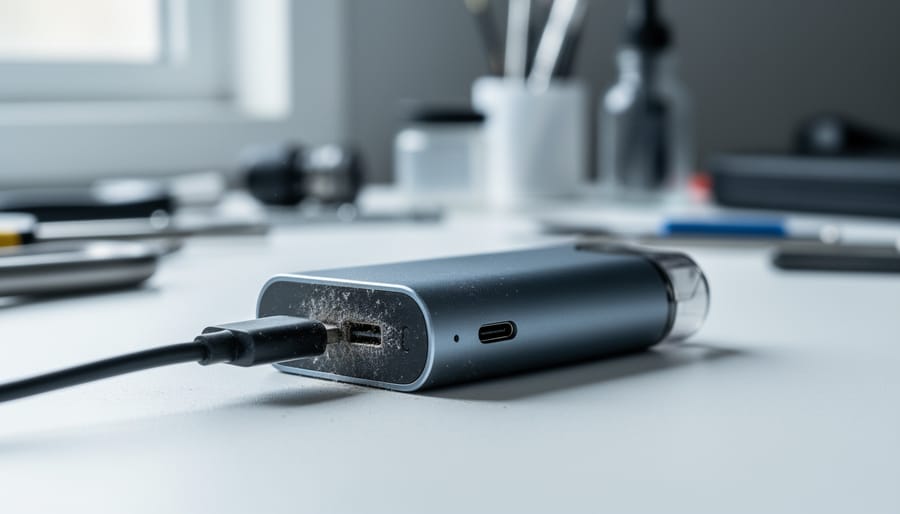
- Clean the charging port: Pocket lint, e-liquid residue, and dust accumulate in charging ports and block proper connection. Use a dry cotton swab or a wooden toothpick to gently remove debris. Never use metal objects that could damage the contacts.
- Inspect for physical damage: Check the charging port for bent pins, the device body for cracks, and the battery for any signs of swelling or dents. Visible damage usually means the device needs replacement rather than repair.
- Test the power button sequence: Most vapes require five rapid clicks to turn on or off. Try this pattern even if you think the device is already on. Some models have different patterns, so consult your manual if five clicks doesn’t work.
- Check internal battery connections: For devices with removable batteries, ensure they’re inserted correctly with proper polarity. Clean the battery contacts with a cotton swab if needed. Understanding battery compatibility helps prevent connection issues from using the wrong battery type.
If none of these steps restore power, the issue likely involves internal circuitry or a failed battery that requires professional assessment or replacement.
Weak Vapor or No Vapor Production
When you’re barely getting any vapor, or none at all, from your budget vaporizer, it’s usually a simple fix rather than a dead device. Weak vapor production often points to an issue with airflow, coil saturation, or power delivery, all of which you can troubleshoot yourself.
- Check your e-liquid level. If the tank is nearly empty, the coil can’t wick enough liquid to produce vapor. Refill to at least a quarter full and give it a minute to saturate the coil.
- Clear the airflow vents. Flip the device over and inspect the small vents around the base. Pocket lint, dust, or e-liquid residue can block airflow completely. Wipe them clean with a dry cloth or cotton swab.
- Verify the coil is seated properly. Unscrew the coil and check that it’s threaded in snugly, not cross-threaded or loose. A poor connection disrupts power delivery and vapor output.
- Adjust the wattage or voltage if your device allows it. Some budget models have variable settings. If the power is set too low, you’ll get thin vapor. Bump it up incrementally and test.
- Inspect for leaks around the coil or tank seals. Even a small leak can drop the internal pressure needed for proper vapor production. Tighten all connections and replace any damaged o-rings.
- Prime a new coil thoroughly before use. If you just installed a fresh coil, add a few drops of e-liquid directly onto the cotton wicking ports, then let the filled tank sit for several minutes before firing. Dry hits kill vapor instantly.
These steps resolve most vapor issues without needing replacement parts. If you’ve worked through each one and still see no improvement, the coil itself has likely reached the end of its usable life and needs swapping out.
Burnt Taste or Harsh Hits
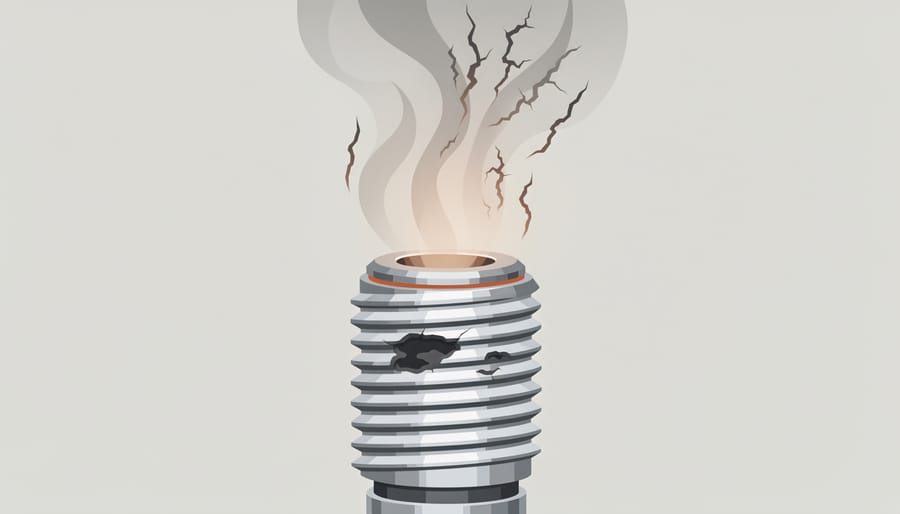
A burnt taste means your coil is overheating or has degraded. Start by checking how long you’ve been using the current coil. Most budget device coils need replacement after consistent use, though the exact timeframe varies by device and vaping habits. If you’ve been using the same coil for a while and the taste turned harsh, it’s likely burned out and needs replacing.
Before swapping the coil, verify your tank has enough e-liquid. A low tank exposes the coil’s cotton wick, causing it to burn. If you’ve recently refilled, make sure the new coil is fully saturated. After installing a fresh coil, let it sit for a few minutes with e-liquid before vaping. Some vapers add a few drops directly onto the exposed cotton ports to speed up saturation.
If your device has adjustable wattage, try reducing the power. Budget coils often can’t handle higher settings without scorching. Start low and increase gradually until you find a comfortable balance between vapor production and flavor.
Check your e-liquid’s viscosity too. Thick, high-VG liquids don’t wick efficiently in some budget coils, leading to dry hits. If you’re using a max-VG blend, consider switching to a 50/50 or higher-PG ratio for better absorption. This simple change often eliminates harsh hits without any hardware adjustments.
Leaking Issues
Leaking is one of the most frustrating issues with budget vapes, but it’s usually fixable with a few quick checks. Start by disassembling your tank and inspecting all seals and o-rings for damage, displacement, or debris. These rubber rings can shift during assembly or degrade over time, creating gaps where e-liquid escapes. If they look worn or cracked, replacements are inexpensive and widely available.
Next, ensure your tank is properly assembled. Each component should screw together snugly without being overtightened, which can actually damage seals. Check that your coil is firmly screwed into the base, a loose coil is a common leak source. Look closely for hairline cracks in the glass or plastic tank; even minor damage can cause persistent leaking.
Overfilling is another frequent culprit. Fill only to the maximum line, leaving some air space at the top. When e-liquid reaches the central airflow tube, it will leak out through the airholes.
Finally, store your device upright whenever possible. Leaving a vape on its side, especially in warm conditions, allows e-liquid to seep into areas it shouldn’t reach. If you’ve tried these steps and leaking continues, the tank itself may have a manufacturing defect that makes replacement the best option.
Blinking Lights or Error Indicators
Most budget vapes use blinking LED lights to signal specific problems. A rapidly blinking light often indicates a connection issue between the battery and atomizer, while slow, steady blinking typically means the battery needs charging. Some devices blink to show the battery is completely drained or that you’ve exceeded the device’s power limits during a draw. If your vape blinks when you press the fire button, try unscrewing and reconnecting the tank or pod to reset the connection. Many devices will also blink a specific number of times to indicate different errors. Your device’s user manual will list the exact blinking patterns and what they mean for your specific model. If blinking continues after charging and reconnecting components, the issue may be internal and the device likely needs replacement.
When to Replace vs. When to Repair
Figuring out whether to fix your budget vape or buy a new one comes down to a simple cost-benefit analysis. Most budget vape issues are fixable with inexpensive parts, but sometimes replacement makes more financial sense.
| Scenario | Consider Repair | Consider Replacement |
|---|---|---|
| Coil Issues | Device works fine with new coil; coils are readily available | Compatible coils discontinued or hard to find in Canada |
| Battery Problems | Device is relatively new; charging port just needs cleaning | Battery won’t hold charge; device is past typical lifespan |
| Physical Damage | Minor cosmetic scratches; all functions work normally | Cracked tank, broken threading, or damaged circuitry |
| Overall Cost | Replacement parts cost significantly less than new device | Repair costs approach or exceed budget vape pen cost |
If your device is only a few weeks old and the fix requires just a new coil or proper cleaning, repair makes sense. However, if you’re dealing with multiple simultaneous problems, repeated failures, or a device that’s been heavily used, investing in a replacement often proves more economical. Budget devices have finite lifespans, and chasing repairs on an aging unit can end up costing more than starting fresh with a reliable new model from a trusted Canadian retailer.
Preventing Future Problems with Your Budget Vaporizer
Most budget vape failures are preventable with consistent care. A few simple habits can keep your device running smoothly and help you avoid the frustration of sudden malfunctions.
Start with your charging routine. Always use the cable that came with your device or a replacement that matches the original specifications. Avoid leaving your vape plugged in overnight, and don’t let the battery drain completely before recharging. Your device’s power source lasts longer when you charge it before it drops below 20% and unplug it once it reaches full capacity. Charging in extreme temperatures, whether hot cars or cold outdoor spaces, can also damage the battery over time.
Regular cleaning prevents many common problems. Wipe down the connection points between your tank and battery weekly using a cotton swab or soft cloth. Check the airflow vents for dust or debris, and rinse your tank with warm water when you change flavours. Let all components dry completely before reassembling.
Choose e-liquids that match your device’s design. Budget vapes typically work best with thinner liquids that flow easily, while high-VG formulas can clog coils in devices not built to handle them. Prime every new coil by letting it sit saturated with e-liquid for several minutes before your first puff, and replace coils when you notice flavour degradation rather than waiting for a burnt taste.
Store your device upright in a cool, dry place. Pocket lint, temperature swings, and horizontal storage all contribute to leaks and connection issues that lead to malfunction.
Frequently Asked Questions
How long should a budget vape last?
Budget vaporizers typically last anywhere from a few months to over a year, depending on build quality, usage frequency, and maintenance habits. The battery is usually the first component to degrade, while regular coil replacements can keep the device functional well beyond the initial purchase.
Can I fix it myself or do I need a professional?
Most budget vape issues are simple enough for DIY troubleshooting, including battery checks, cleaning connections, and replacing coils. Professional repair services rarely make economic sense for budget devices, since the cost of service often exceeds the price of a replacement unit.
Are replacement parts worth it for budget models?
Replacement coils are almost always worth purchasing, as they cost just a few dollars and can restore full functionality. However, replacement batteries, tanks, or other components often cost enough that buying a new device becomes the more practical choice.
Why does my new vape not work out of the box?
New devices sometimes arrive with depleted batteries, protective inserts that need removal, or components that require proper assembly before first use. Check that you’ve removed all packaging materials, charged the battery fully, and followed the initial setup steps in how to use your specific device.
Is my budget vape dangerous if it’s malfunctioning?
Stop using a device immediately if you notice excessive heat, strange smells, battery swelling, or sparking. While many malfunctions are minor inconveniences, battery-related issues can pose safety risks and warrant replacing the device rather than attempting repairs.
These questions represent the most frequent concerns we hear from Canadian vapers troubleshooting budget devices. Understanding when you can fix an issue yourself versus when replacement makes more sense helps you make smart decisions about your vaping investment. Most problems fall into the repairable category, but knowing the warning signs of serious malfunctions keeps you safe while you troubleshoot.
Most budget vape problems stem from simple, fixable issues rather than serious defects. A dead battery, worn coil, or loose connection can usually be resolved in minutes with the troubleshooting steps we’ve covered. Regular maintenance makes a real difference: keeping contacts clean, priming coils properly, and using appropriate e-liquid can extend your device’s useful life considerably.
That said, know when to move on. If you’ve worked through the fixes and your budget vape still isn’t performing, or if replacement parts cost nearly as much as a new device, it’s often smarter to invest in a fresh unit. Budget devices have their limits, and sometimes replacement is the practical choice.
Whether you’re troubleshooting your current vape or considering an upgrade, Namaste Vaping provides educational resources and a curated selection of quality vaporizers for Canadian vapers. We’re here to help you make informed decisions at every price point, so you can enjoy a reliable vaping experience without unnecessary frustration.